Sunday, December 15, 2013

Snow Flakes Star Wars Version

Came across Anthony Herrera's designs a couple of month ago and I was mind blown! This guy is awesome and you can just download the patterns for FREE straight off his website.

They are a little challenging to cut but with a pair of sharp sharp scissors, exacto knife and time it is doable! TIP: try to cut maybe 2-3 pieces at a time when it is folded.

Here is my Darth Vader Snowflake!


Floral Nail Art

I know I know back to back nail art tutorials. What can I say a week of traveling has left me nail polish deprived! I used liquid sand while I was on vacation because it is super sturdy. But by the time I had my lay over in SeaTac ... there is a Butter London nail polish store there!!! The only one in the world!!! I was looking at polishes ... the more you buy the more you save! It was 2 bottles for $27.00 and I do not remember the next bracket price. But the girl saw me and asked if I was interested in a 20 minute mani for $26.00 ... I was like ummmmmmm because I usually do not like paying for manicures when I can do my own. So I said sure why not I have 3 hours to kill here. Then she said ... yeah you look like you needed one hahaha I am not offended because I knew they were quite raggedy for sure! And there is something about traveling that makes my hair and nails grow super fast.

What you will need:
Tools:
CD and paper towel
Nail art brush and little container of nail polish remover

Polishes:
Base and top coat
Blue - China Glaze: Electric Beat
Light purple - OPI: Done out in Deco
Dark purple - OPI: Louvre Me Louvre Me Not
Green - OPI: Jade is the New Black
Teal - China Glaze: For Audrey


Tuesday, November 26, 2013

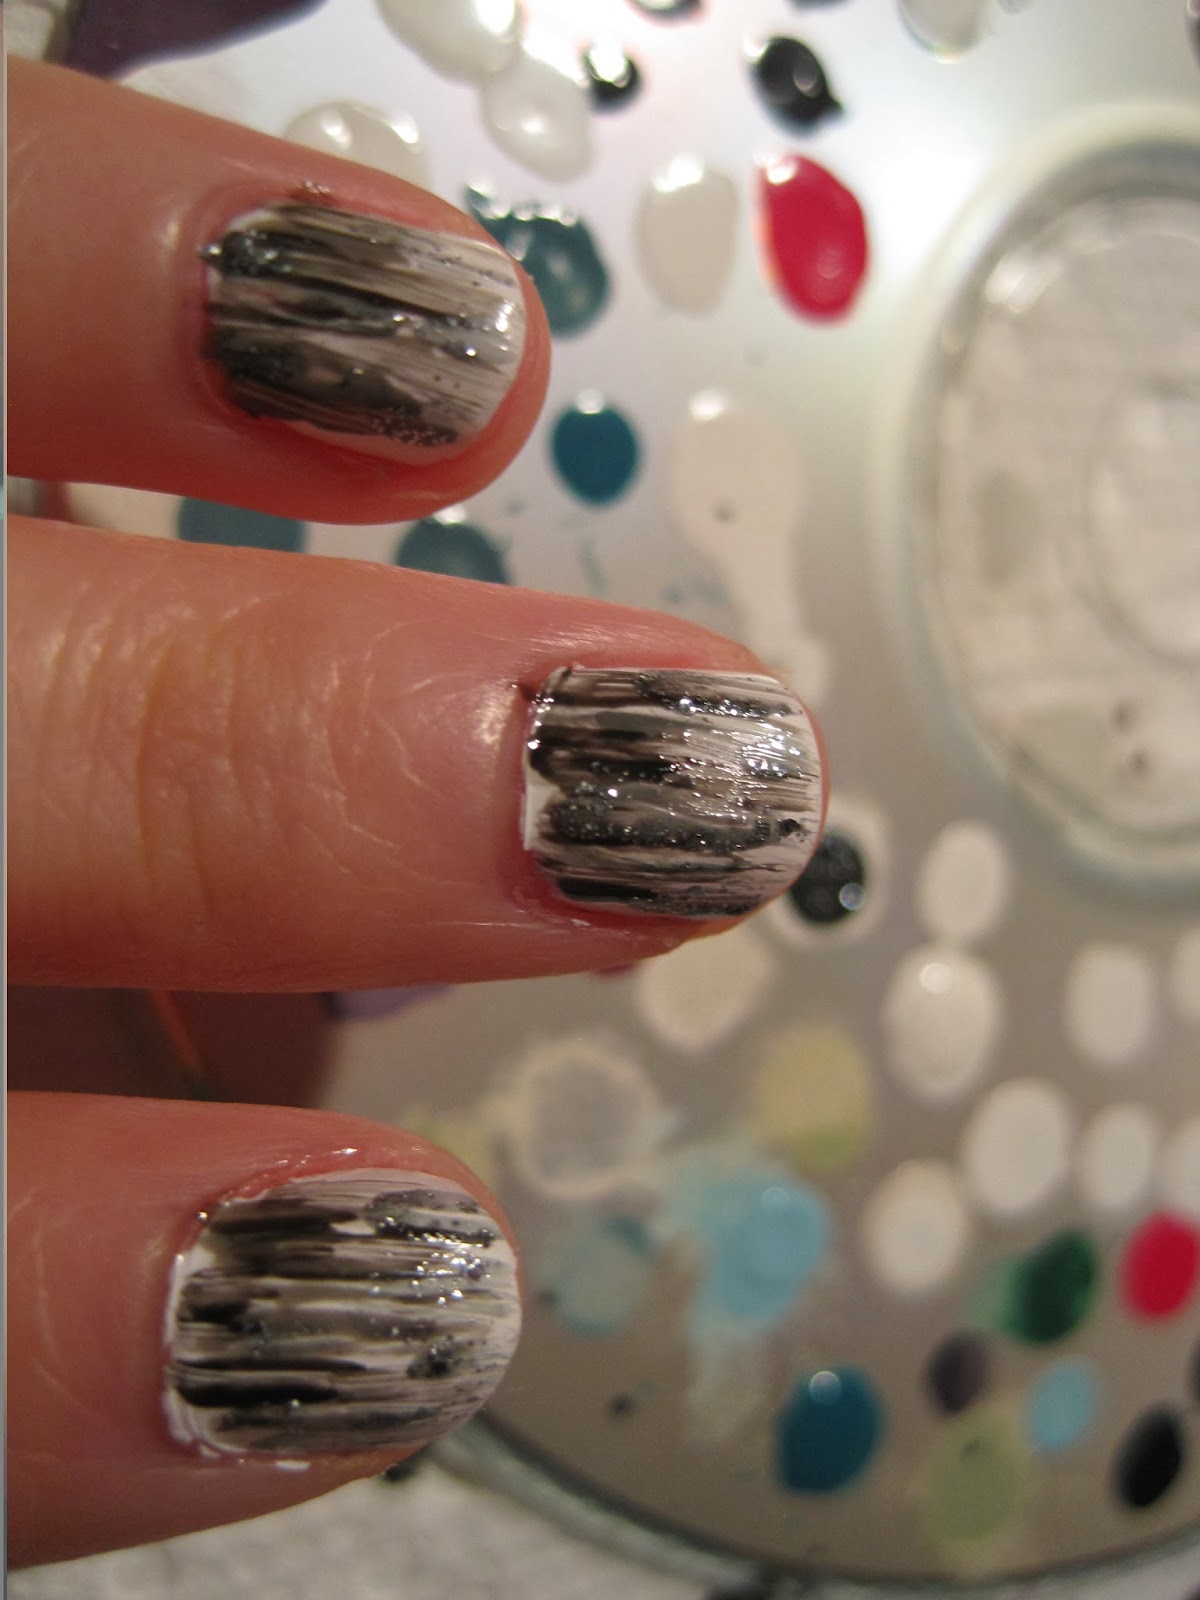
Brushed Nail Art


What you will need:


Tools:
Nail art brush
Little container for nail polish remover (to rinse the nail art brush)
CD and paper towel

Polishes:
Base and top coat
White - used OPI: Alpine Snow
Grey - China Glaze: Recycle
Black - China Glaze: Liquid Leather
Sparkle (optional) - China Glaze: Tinsel Town

Start by applying the top coat and painting the nails white and letting it dry. Then going from lightest to darkest color (grey to black) leaving the sparkles last brush on little streaks of color. Finish off with the top coat. Done like dinner!


Brasil - Rio De Janeiro - Paraty - Sao Paolo

Hey guys!

Sorry for being MIA for the month of November! Anytime I go and come back from vacation there are many things to take care of around the house. Keeping a house hold running is not an easy task!

I went to Brasil for one week. Taking shuttle buses, over night shuttles buses around the country and local buses and subways is a very safe thing and not at once did I feel sketched out. Although everyone speaks Portuguese in Brasil my friend and I found the common language of hand signals works fantasically!

Do not go to Brasil thinking things are cheap because they are not! One night my friend and I wandered into a clothing store and the quality of the goods there were not so great but the prices were way higher than in Canada. We also saw many signs with 5x or 10x assuming it was an in store reward point system they had. It was not. The lady at our hostel in Sao Paolo informed us they were monthly payments, 5 months or 10 months. People in Brasil finance their clothing. This was something new to me and my friend. Imported products get taxed heavily and are prized in Brasil. Goods made in China are an everyday common thing to us Canadians but in Brasil they have a dedicated tag to themselves 'importato producto'.

Not everything is ridiculously expensive in Brasil there are street vendors and markets as well. My friend and I randomly wandered to a craft store that can rival those in Hong Kong. It was at least 5 stories high! A must see is the Saturday flea market in Sao Paolo, this is one true antique flea market. We were also lucky enough to catch the Sunday Hippie Market in Rio before I had to fly back home.

Side note: do not think you can tour around the fancy hotels in Rio De Janeiro. My friend and I decided to take a look inside the ballin' Copacabana Palace ... we did not make it past the second step inside the lobby ... we got escorted out not by one but two security guards in suits and ear pieces :D  

Would I recommend traveling to Rio De Janeiro - yes. Sao Paolo - maybe. Beach town of Paraty - yes but one day is enough if you are not doing the wilderness excursions.

Monday, October 28, 2013

Pumpkin Carving - using semi pounce technique

The previous post described how Michelangelo transferred images onto a canvas. I did a similar technique in transferring an image onto a pumpkin for carving.


What you will need:

- gutted pumpkin
- image or stencil of what you wish to carve
- small knife
- sewing pins
- exact o knife or a set of wood carving tools (purchased from Michael's for about $10.00 - highly recommended)

Step One:

Pin the image onto the pumpkin. Only pin in the area where you will need to carve.


Step Two:

Using an exact o knife make little puncture slits along the outline of the image - about 1cm in length and 0.5cm apart. Ensure to cut through the paper onto the surface of the pumpkin. Remove the pins and paper.


Not sure if you are able to see the little slits outlining the image but its there!

Step Three:

Using wood carving tools or a knife connect the dots and carve out your image! I purchased a set of wood carving tools from Michael's several years ago for about $5.00 after the 40% coupon discount  and to me its a really really good investment.


Michaelangelo and the Pouncing Technique


When Michelangelo painted the Sistine Chapel he used a technique called "poucing" to transfer his images onto the ceiling for painting. He would sketch the drawings on large pieces of paper then puncture tiny holes along the outlines of the images. These large pieces of drawings were then temporary placed onto the ceiling where he would dab a cloth wrapped in chalk along the punctures holes. Once the paper is removed little dots of chalk would be left behind. He would then use a paint brush to connect the dots and paint the image. 


Saturday, September 28, 2013

Floss like a Boss

Yes this post is about ... Dental Floss!

It all started out when a friend mentioned about making a whole chicken but did not have twine and I blurted out non-waxed dental floss!

It worked!

There are many usages of dental floss than actually using it for your teeth. Even for flossing you're supposed to tie the piece of floss into a loop to floss instead of wrapping it on both your pointing fingers!

Dental floss is actually stronger than a lot of strings out there. If I were to pack a Bug out Bag aka survival bag I would definitely pack floss!

DIY:
- sewing - instead of using thread
- beading

KITCHEN:
- cutting cinnamon buns for baking
- sliding it underneath cookies to get them off a baking sheet
- cutting soft cheese
- tying meat for baking like drumsticks of a whole chicken
- tying herbs to throw into a stew or soup

MANLY STUFF:
- using it as a temporary shoe lace
- tying double zippers together to prevent them from opening up (sleeping bags)
- sliding it behind car decals to get them off of cars
- cleaning in between grooves of a bolt or screw 

GIRLY STUFF:
- wrapping it around your finger tightly to get rings off
- nail art
- flossing between makeup compact palettes to get them out to replace them