Showing posts with label China Glaze. Show all posts

Sunday, December 15, 2013

Floral Nail Art

I know I know back to back nail art tutorials. What can I say a week of traveling has left me nail polish deprived! I used liquid sand while I was on vacation because it is super sturdy. But by the time I had my lay over in SeaTac ... there is a Butter London nail polish store there!!! The only one in the world!!! I was looking at polishes ... the more you buy the more you save! It was 2 bottles for $27.00 and I do not remember the next bracket price. But the girl saw me and asked if I was interested in a 20 minute mani for $26.00 ... I was like ummmmmmm because I usually do not like paying for manicures when I can do my own. So I said sure why not I have 3 hours to kill here. Then she said ... yeah you look like you needed one hahaha I am not offended because I knew they were quite raggedy for sure! And there is something about traveling that makes my hair and nails grow super fast.

What you will need:
Tools:
CD and paper towel
Nail art brush and little container of nail polish remover

Polishes:
Base and top coat
Blue - China Glaze: Electric Beat
Light purple - OPI: Done out in Deco
Dark purple - OPI: Louvre Me Louvre Me Not
Green - OPI: Jade is the New Black
Teal - China Glaze: For Audrey


Tuesday, November 26, 2013

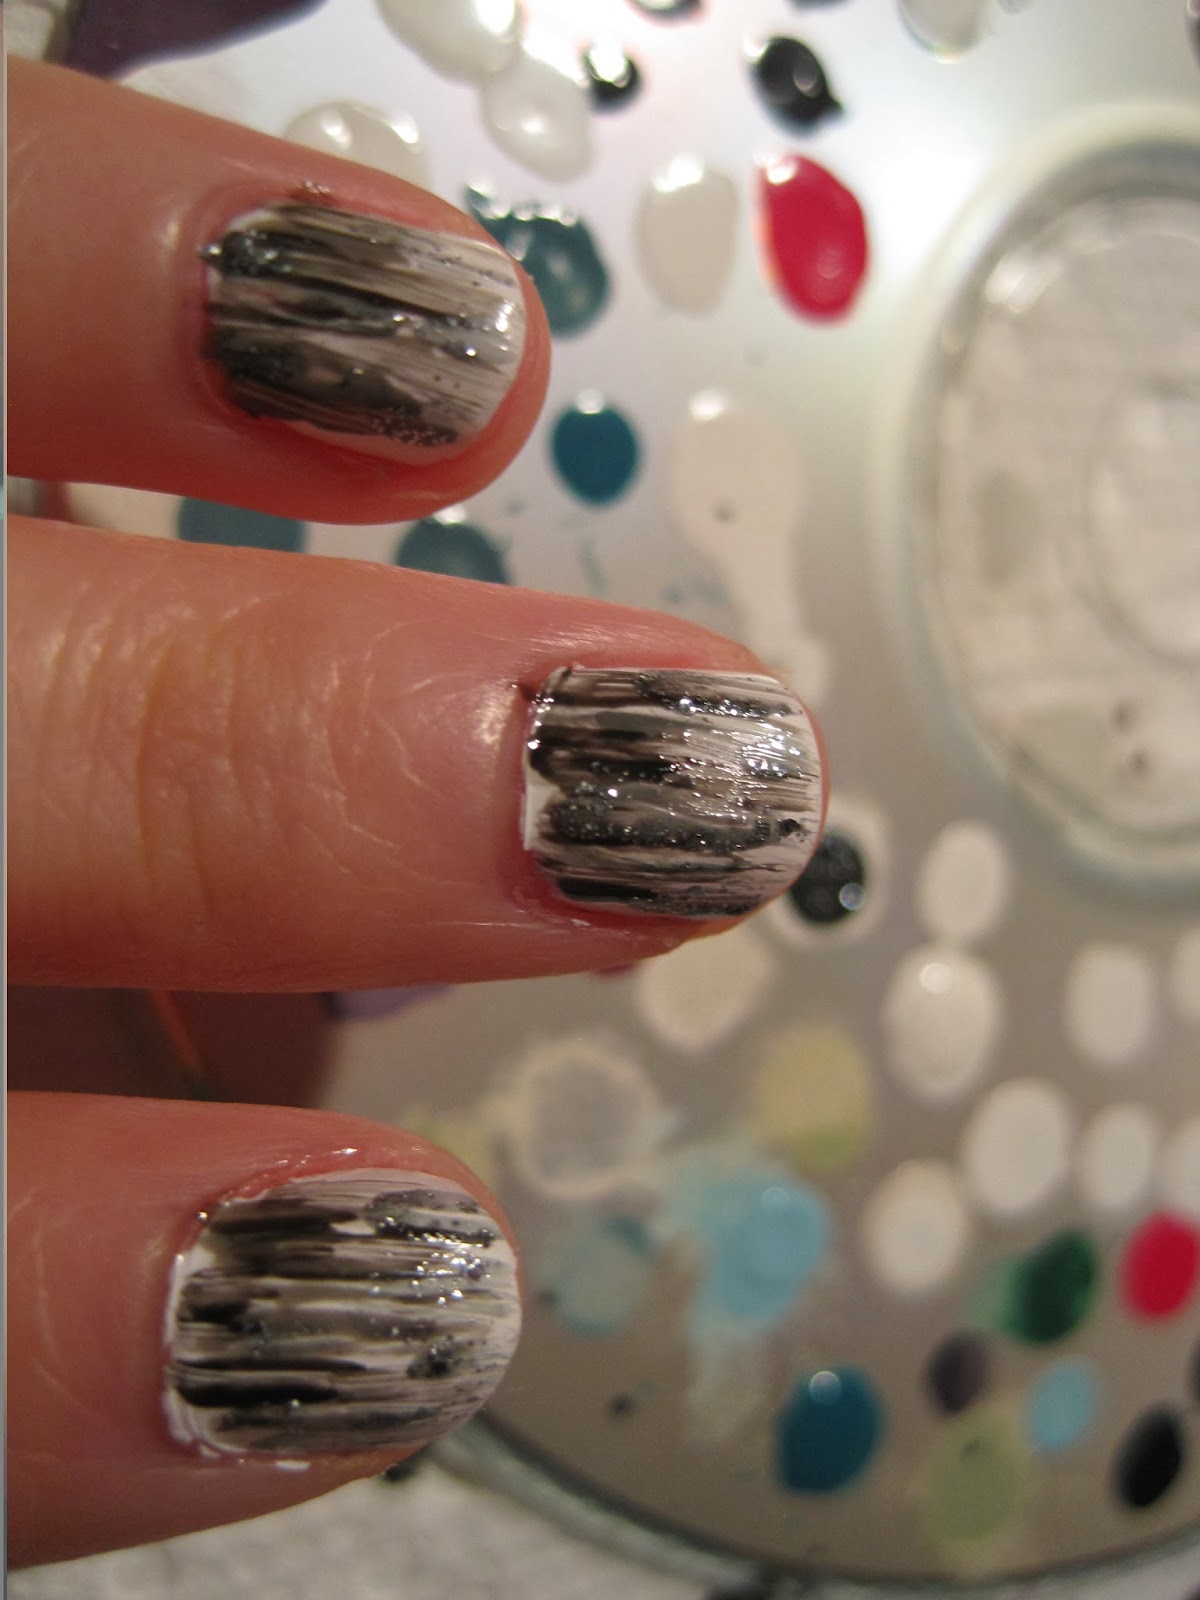
Brushed Nail Art


What you will need:


Tools:
Nail art brush
Little container for nail polish remover (to rinse the nail art brush)
CD and paper towel

Polishes:
Base and top coat
White - used OPI: Alpine Snow
Grey - China Glaze: Recycle
Black - China Glaze: Liquid Leather
Sparkle (optional) - China Glaze: Tinsel Town

Start by applying the top coat and painting the nails white and letting it dry. Then going from lightest to darkest color (grey to black) leaving the sparkles last brush on little streaks of color. Finish off with the top coat. Done like dinner!


Monday, July 15, 2013

Nail Art Tutorial: Beach Sunset Tony Montana style


Al Pacino's character Tony Montana from the movie Scarface has one epic wall mural! I remember watching this movie for the first time about five years ago and I fell in love with the wall paper but realistically no one would do all four walls including the door like that ... unless you're ballin' and mad like Tony Montana. Perhaps just an accent wall but even then it is not cheap. Yes, I did Google and try to look it up back in the day. A 3m by 4m sheet is almost $1,000.00. 

But here is my less permanent and less expensive version on my nails! 

 What you will need:


- small make up sponge
- fine nail art brush or fine paint brush
- piece of paper towel
- cotton swabs and nail polish remover (for clean up)

Nail Polish I used:
Orange - O.P.I - Hot & Spicy
Yellow - Sally Hansen - Mellow Yellow
Red - Chanel - Dragon
Black - China Glaze - Liquid Leather

**** optional pre step one **** 
Many nail artists put tape or vaseline on the skin around their finger nails to lessen clean up, I personally choose not to because I find it to be more work fighting with tape over a cotton swab.

Step One: Ombre time!

Cut the make up sponge to the average width of your finger nail and paint it with the nail polish in this order. 


Then dab it lightly onto the paper towel to remove excess nail polish and to prevent it from glopping and hard core smudging on your nail.


Step Two: Sponging time!

In a dabbing rolling from left to right motion sponge on the color. Do it a few times until you have the desired hue you want. Clean up the finger nail edges with a cotton swab dipped in nail polish remover.


Step Three: Beach and Palm tree painting!

Now using the nail art brush or paint brush dip it into the black nail polish and paint the beach and palm trees as shown below.


Top coat it then you're done like dinner! 

Tuesday, April 9, 2013

Cowabunga dude! Its pizza time!

I know I know another blog post about nail art really?! really! It is happening! Remember TMNT? No? Well it stands for Teenage Mutant Ninja Turtles!


There are 4 of them:

Leonardo - Blue - Katana Sword
Raphael - Red - Twin Sai
Donatello - Purple - Bo Staff
Michelangelo - Orange - Nunchaku


Other main characters include April, the news reporter babe in a one piece yellow jump suit and the wise old master rat Splinter.


Things you will need:

Dotting tools and nail polish!!!
optional - black nail art pen for April's belt buckle if you want to do April

Black - China Glaze: Liquid Leather
White - OPI: Alpine Snow
Yellow - Sally Hansen: Mellow Yellow
Green - OPI: Jade is the New Black
Blue - China Glaze: Electric Beat
Purple - Sephora by OPI: Domestic Goddess
Red - OPI: From A to Zurich
Orange - OPI: Hot & Spicy

Step One: Base
Seeing that it is the month of April I chose to do an accent nail dedicated to April the news reporter :D

Paint 4 nails green and one yellow. Wait till all the nails are dry then using the white nail polish paint a strip across all 5 nails. It is okay if it is mangled like mine! It will be perfected later, trust me! The reason for painting the white strip is to enhance the mask color later. Any color on top of green does not turn out right.

PS: my yellow doesn't have a white strip because it was still drying.


Step Two: Bandana

Paint blue, purple, orange and red on top of the white strips. Again do not panic if it is not perfect, it will be fixed!


Step Three: Eyes

Now using the dotting tool blot 2 white spots for eyes wait until they dry and using a smaller dotting tool blot 2 black dots for pupils! OMG ALMOST DONE!


Step Four: Cleanup

Remember the uneven white strips and colors going over board? Use the green to cover it up! Its just that easy because the green is darker than all the other color used especially the white!

Step Five: April

Using a black nail art pen draw a letter D and a - in it for the belt buckle and using a very fine dotting tool do little black dots for the belt loop holes.


COWABUNGA DUDE NOW YOU'RE DONE LIKE PIZZA DINNER!!!!

Saturday, February 16, 2013

Morse Code

Nail art idea!!! Hidden messages YES and it looks tribal but not!!!


Colors used:
OPI - That's Hot Pink! (base)
China Glaze - For Audrey (dots)
Color Club - Aqua (dashes)

Thursday, February 7, 2013

Camo is sick

Camo is sick says a boy.

I have a Pony Palm plant growing on my desk at work for the past two years, it is so over grown that I have nick named it The Congo. So after a year I finally did it, I went and got a bag full of little green plastic army men and hid them among the bushes for recon missions.

With that wonderful idea my men needed to be incognito ... camouflaged. What a nail polish fanatic to do but obviously camo him out with nail polish of course! ... one idea lead to another ... Why don't we play matchy matchy with my men and camouflage my nails too! I'm gonna have me some fun.


What you will need: 
- CD palate
- dotting tools
- tons of greens, browns and black for green camouflage - forest
- tons of white, greys and black for white camouflage - snow
Optional - Essie Matte About You (cus c'mon ladies we ain't going to really play war rocking sparkley nails)

Colors used for green camouflage are (front lightest to darkest):
Butter London - Bossy Boots (green) - base
OPI: Jade is the New Black (green)
OPI: Cuckoo for this Color (green)
OPI: Wooden Shoe Like to Know (brown)
OPI: Tickle Me France-y (pale brown)
China Glaze: Liquid Leather (black)

Colors used for white camouflage are (front lightest to darkest): 
OPI: Alpine Snow (white)
OPI: Moon Over Mumbia (greyish white)
OPI: Skull & Glossbones (greyish white)
China Glaze: Recycle (grey)
China Glaze: Liquid Leather (black)

I used the lightest color as my base. Using the dotting tool I did a free for all splatter like pattern because camouflage is supposed to reflect messy, dirty, decaying animals and leaves in nature so just glop it free style!


I repeated it with the next darker shade and the next darker shade until I only had black left. In the same fashion without care splotted it until it was one hodge podge of camouflage mess.  TA DA!!! perfection in imperfectioness!!!


After letting it dry I applied two coats of Essie's 'Matte About You' to make it look more rugged ... this is one chip worthy nail art I am looking forward to!


Time to find myself a ghillie suit and start learning how to army crawl if I want to be next to hottie Mark Wahlberg in The Shooter.


Thursday, January 3, 2013

Polka Dottin'

This is officially my first nail art tutorial! HOORAH HOORAH!

The polka dot was chosen because it is basically the gate way drug involving the dotting tool to all nail art from here!

What you will need:

1. Base coat

2. Two different nail polish colors (colors chosen for this tutorial are China Glaze: For Audrey and OPI: Fly)
3. Dotting tools (a set of 5 purchased on eBay for about $2.00 with FREE shipping. Toothpicks, pin heads on pencil tops, bobby pins can also do the job but I chose to purchase a set as an investment rather than using multiple toothpicks and bobby pins in the long run) 

4. Top coat (Recommend: Seche Vite dry fast top coat. It works. To the point I gift them to every girl I know. Especially when you think your nails are dry and go to bed only to wake up with sheet marks in them. One of my friends told me she sleeps like Count Dracula because of that problem, gifted Seche Vite!)

5. Old CD and a paper towel as your fancy artistic pallet


I personally remove my previous nail polish before taking a shower because that way it cleanses all the residual nail polish and the chemical feeling of the remover. It also preps and softens your cuticles for trimming.

Note: do not push and trim your cuticles EVERY TIME you do your nails because over trimming will toughen the skin around the nail beds creating a tougher cuticle resulting in DUN DUN DUN ... MAN HAND FINGERS!

Remember to always, always, I cannot emphasize enough times ... ALWAYS use a base coat. Not only does it bond the polish better to your nail making it last longer it also acts as a buffer from staining your nails yellow, red, black or which ever color you previously rocked. It also makes sparkly nail polish easier to remove in my opinion.

After applying your base coat and letting it dry, apply the base color of which ever your heart fancies. Then drip one drop of the secondary color onto the CD. Time to dip and dot!!!

I like to dip before each dot that way the pigment of each dot is the same and not running low by the 3rd dot. If the polish starts to get tacky or gloppy and you notice the dot is getting larger because the polish is drying on the tool, its time to swipe and clean with the paper towel. 

Start from left to right and top to bottom. (Please love my paint schematics lol) Notice the column of dots are one imaginary dot apart from each other, this is to create a "window" affect like movie theater seating for the next column of dots.


Wait until all the dots are completely dry before applying the top coat to prevent dragging marks from the dots.


O snap WHAT DID YOU JUST DO?! epic nails is what you did!

Tip: if you cannot paint within the lines even if your life depended on it like me, cheat. There are nail polish corrector pens everywhere but after a while they get kind of gross like this.


So a trick I learned is toothpick and some cotton = precision minus the permanent grossness. Get a tiny amount of cotton and a pointed end tooth pick and roll the tip of the toothpick into the cotton until it looks like this. Then dip the cotton covered tooth pick into nail polish remover and erase what you gotta erase!